

Making a DIY Creatine Gummies Recipe at home is one of the smartest things I’ve done for my supplement routine. No more chalky powder stuck to the bottom of my shaker cup. No more overpriced store jars with tiny serving counts. Just simple, chewy gummies I make myself in about 20 minutes.
My first batch was a little rough around the edges. The texture was off, and I measured incorrectly. But after a few tries, I nailed a recipe that works every single time. Now I make a fresh batch every two weeks, and it costs me less than a dollar per week to hit my daily creatine dose.
These gummies are simple to make and to take. You know exactly what is in them. There are no fillers, no dyes, and no mystery ingredients. Just clean and effective creatine that is fun to take every day.
What Are Creatine Gummies and Do They Actually Work?
Creatine is one of the most studied and proven supplements in sports nutrition. It helps your muscles produce energy more quickly during short, intense bursts of activity, such as lifting weights or sprinting. More energy during a set means more reps, more power, and better recovery between sessions.
Creatine gummies deliver the same ingredient, creatine monohydrate, that you find in powder form. The only difference is the delivery method. Chewing a gummy is a lot more appealing than mixing a cloudy powder into water, especially first thing in the morning.
Homemade versions work just as well as store-bought ones. What matters most is the total daily amount you take, not the format. Most research supports a dose of 3 to 5 grams per day for healthy adults.
Results start showing up within two to four weeks of taking it consistently. Some people use a loading phase of 20 grams per day for 5 to 7 days to speed up the process. Either path works, and a good DIY creatine gummies recipe makes it easier to stick to either.

Top Reasons to Skip Store-Bought and Go Homemade
Making my own gummies saves me a lot of money. Each serving costs me well under twenty cents. Besides saving money, I can choose exactly what goes into each gummy. There are no artificial colors, no small doses hidden behind flashy labels, and no hard-to-pronounce ingredients.
I select the juice, the sweetener, and the amount that suits my training needs. This level of control is valuable, and it’s a key reason I stopped buying store-made gummies.
Ingredients for My DIY Creatine Gummies
1 cup fruit juice: Use apple, grape, or berry juice. Grape and berry juices work best because their strong flavors cover the mild bitterness of creatine. Avoid very acidic juices, such as lemon or grapefruit, as they can break down creatine over time. Apple juice is a mild option. You can also use a flavored drink mix dissolved in water.
1.5 tablespoons of agar agar powder: This ingredient makes the gummies chewy and helps them hold their shape better at room temperature, making it easier to carry the gummies.
5 grams of creatine monohydrate (unflavored): the key ingredient. Creatine monohydrate is affordable and well-studied. Measure it accurately with a kitchen scale. Do not estimate the amount.
1 to 2 tablespoons of honey or your favorite sweetener: Honey adds slight sweetness and blends well when warm. Agave works similarly. For a sugar-free option, try stevia or monk fruit, which won’t change the gummy’s texture.
Optional: A small pinch of salt or electrolyte powder is a personal preference I enjoy for added minerals. It also improves the flavor, making the gummies taste better.
Tools That Make This Recipe Much Easier
- Small saucepan: keeps heat low and even
- Whisk: breaks up clumps
- Kitchen scale: measures creatine accurately
- Silicone gummy molds: easy-to-remove gummies
- Dropper or small spoon: fills molds neatly
- Airtight storage container: keeps gummies fresh
How to Make DIY Creatine Gummies (Simple Steps)
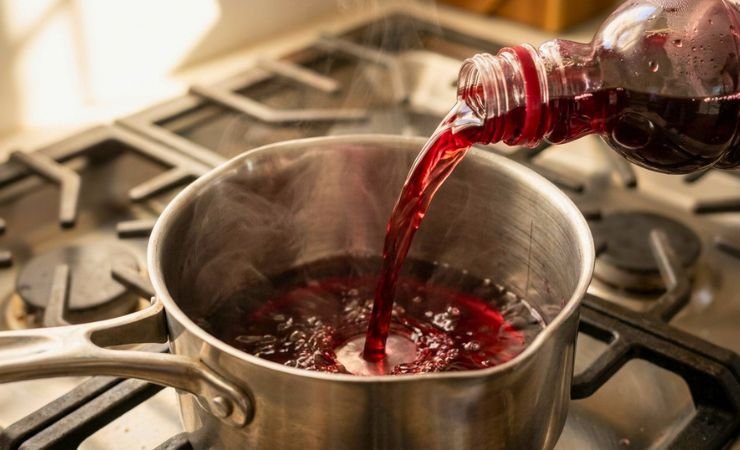
1. Warm the Juice: Pour one cup of fruit juice into a small saucepan. Heat the juice on low until it reaches 140 to 150 degrees Fahrenheit. The juice should feel warm but shouldn’t bubble or boil. Sprinkle 1.5 tablespoons of agar agar powder evenly over the warm juice. Let it sit for about 2 minutes without stirring, allowing the agar to absorb the juice and mix better later.
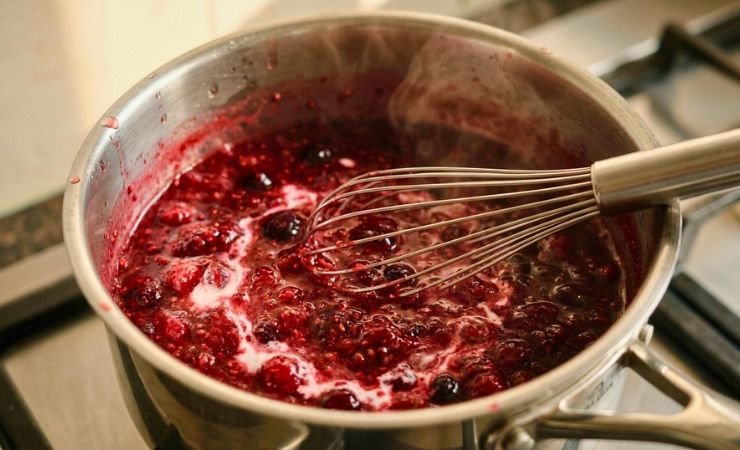
2. Whisk Until Smooth: After 2 minutes, gently whisk the agar into the juice until it fully dissolves. Ensure there are no lumps. If you see lumps, whisk on low heat until the mixture is smooth and slightly thick.
3. Remove from Heat and Cool Slightly: Take the pan off the heat and cool it to about 120 to 130 degrees Fahrenheit. This temperature is important for maintaining the effectiveness of your creatine. High heat can turn creatine into a form your body cannot use.
4. Add Creatine and Sweetener: Once the mixture has cooled, add 5 grams of creatine monohydrate and your sweetener. Stir for one to two minutes. The mixture may look slightly cloudy, which is normal. Creatine doesn’t fully dissolve, so a hazy look is expected.
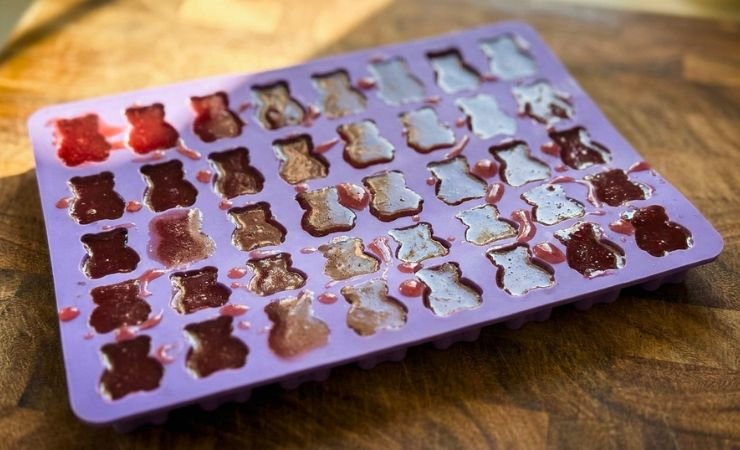
5. Pour Into Molds Quickly: Use a dropper or small spoon to fill your silicone molds right away. The mixture sets quickly as it cools. Stir the pan between pours to keep the creatine evenly mixed. Place the filled molds in the refrigerator for 30 to 60 minutes. Once firm, pop the gummies out and store them in an airtight container in the fridge until you are ready to use them.
My Best Tips for Perfect Gummies Every Batch
Always measure creatine on a scale: Scoops and spoons are not accurate enough. A small difference in grams changes your dose and throws off the whole point of making precise gummies.
Stir right before each pour: Creatine settles fast. Skipping this step means the last few gummies in the batch will have way more creatine than the first ones.
Use strongly flavored juice: Creatine has a mild, slightly bitter, and slightly sour taste. Grape juice and mixed berry blends cover it well. Light or watery flavors, like white grape juice or weak punch mixes, make the bitterness more noticeable.
Fix sticky gummies with a light dusting of starch: Lightly tossing finished gummies in a tiny amount of cornstarch or tapioca starch keeps them from sticking together in the container.
Use larger molds for practical dosing: Fifty tiny gummies per day is not realistic. Use larger silicone molds and aim for 10 to 20 gummies per batch to hit your daily dose without having to count out a huge pile each morning.
Fun Ways to Switch Up Your Creatine Gummies
Sugar-Free Version: Replace fruit juice with a zero-sugar flavored drink mix, such as Crystal Light, dissolved in water. Use stevia or monk fruit drops as your sweetener. The texture stays the same, and the flavor can be just as good.
Jello Creatine Gummies: Replace plain and juice with a small box of flavored mix, which works well for a quick version and gives a stronger, brighter flavor. Keep in mind this adds sugar and artificial ingredients, so it depends on your personal preferences.
Electrolyte Creatine Gummies: Add a scoop of unflavored or lightly flavored electrolyte powder to the mix before pouring; each gummy delivers sodium, potassium, and magnesium, which pair well with a pre- or post-workout routine.
Pre-Workout Version with Caffeine: This one requires extra care. Caffeine powder is very concentrated, and too much is genuinely dangerous. Use a precision scale, not a measuring spoon, and start with no more than 100 milligrams per serving. This version is for experienced supplement users only.
Best Ways to Take Your Creatine Gummies Daily
Creatine gummies do not need to be paired with anything specific to work. That said, taking them with food or a drink can help with absorption and reduce any mild stomach discomfort that some people notice when taking creatine on an empty stomach.
I usually take my gummies with breakfast in the morning or right before a workout, with a glass of water. Water is always a good companion because creatine pulls water into muscle cells, and staying hydrated supports that process.
Some people take them with a protein shake or a carbohydrate-rich snack, such as a banana or toast, since research suggests that the insulin response to carbs may slightly improve creatine uptake in muscles.
You can take them at any time of day, and the timing matters a lot less than taking them consistently. Pick a time that fits your routine and stick with it.
How to Store Creatine Gummies and Keep Them Fresh
Refrigerator: Store finished gummies in an airtight container in the fridge. They stay fresh and firm for 7 to 14 days. Because homemade gummies contain real fruit juice and no commercial preservatives, they are more perishable than store-bought versions.
Freezer: For longer storage, freeze gummies in weekly portions. Frozen gummies last up to three months with no loss of creatine potency. Move a portion to the fridge the night before, and they thaw overnight with no issues.
Room Temperature: Homemade gummies left out at room temperature are only good for one to three days at most. Humid environments speed up mold growth. Do not leave them sitting on the counter for extended periods.
Batch Strategy: I make two weeks’ worth at a time, keep one week in the fridge, and freeze the second week. It keeps the routine low-effort without wasting any gummies.

DIY Creatine Gummies Recipe
Make this easy DIY creatine gummies recipe at home in 20 minutes. Clean ingredients, accurate dosing, and a fraction of the store-bought cost.
Ingredients
- 1 cup fruit juice (grape, berry, or apple)
- 1.5 tablespoons agar agar powder
- 5 grams creatine monohydrate (unflavored)
- 1 to 2 tablespoons honey or preferred sweetener
- Optional: 1 small pinch of salt or electrolyte powder
Instructions
- Pour one cup of fruit juice into a small saucepan. Heat the juice on low until it reaches 140 to 150 degrees Fahrenheit. The juice should feel warm but shouldn't bubble or boil.
- Sprinkle 1.5 tablespoons of agar agar powder evenly over the warm juice. Let it sit for about 2 minutes without stirring, allowing the agar to absorb the juice and mix better later.
- After 2 minutes, gently whisk the agar into the juice until it fully dissolves. Ensure there are no lumps. If you see lumps, whisk on low heat until the mixture is smooth and slightly thick.
- Take the pan off the heat and cool it to about 120 to 130 degrees Fahrenheit. This temperature is important for maintaining the effectiveness of your creatine. High heat can turn creatine into a form your body cannot use.
- Once the mixture has cooled, add 5 grams of creatine monohydrate and your sweetener. Stir for one to two minutes. The mixture may look slightly cloudy, which is normal. Creatine doesn't fully dissolve, so a hazy look is expected.
- Use a dropper or small spoon to fill your silicone molds right away. The mixture sets quickly as it cools. Stir the pan between pours to keep the creatine evenly mixed. Place the filled molds in the refrigerator for 30 minutes.
- Once firm, pop the gummies out and store them in an airtight container in the fridge until you are ready to use them.
Nutrition Information:
Yield: 20 Serving Size: 1Amount Per Serving: Calories: 25
This DIY Creatine Gummies Recipe is one of the most practical additions to my supplement routine. Accurate dosing, clean ingredients, and low cost make it a clear win over overpriced alternatives.
Measure carefully, keep temperatures in check, and refrigerate right away for a fresh, effective batch every time.